Shed Electricity Part I: How not to run electricity to a shed
A woodworking workshop needs electricity to power its machines, tools, and lights. The more powerful the machines, the more power the workshop needs.
How much power?
My workshop doesn't need enough power for all of the tools, just enough for all of the tools which run at the same time.
- 3 hp bandsaw using 20 amps at 240v
- Ductless mini-split using 15 amps at 240v
- Dust collector using 15 amps at 120v
- Shop vacuum using 8 amps at 120v
- Various lights and chargers using 5 amps at 120v
The max comes out to a little over 60 amps. To be on the safe side, and for future-proofing (in case I want to add an electric vehicle charger in the future or some new big machines), I went with a 100 amp panel.
Preparing for the electrician
My city required me to get an electrical permit for the shed. I applied for one with my electrician and got started on the prep work while I waited on the city.
Removing the deck
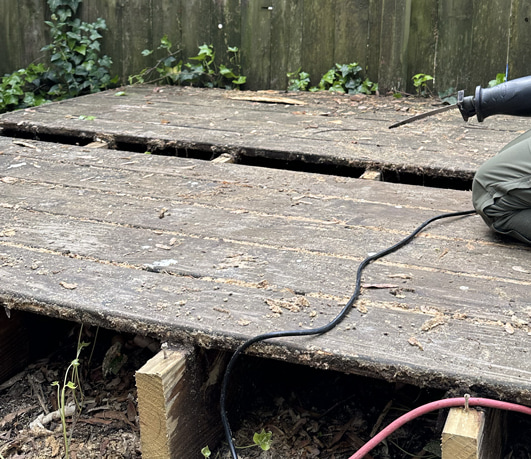
I like having a yard, and my partner and I have big plans for our backyard once the shed is done. Unfortunately, there was a deck in the way. We used a circular saw, reciprocating saw, and maul to chop off over 100 sq ft of decking boards and joists. Removing this portion of deck also cleared the way for a trench: a neccesity for running electricity from the meter to the shed's electric panel.
Digging the trench
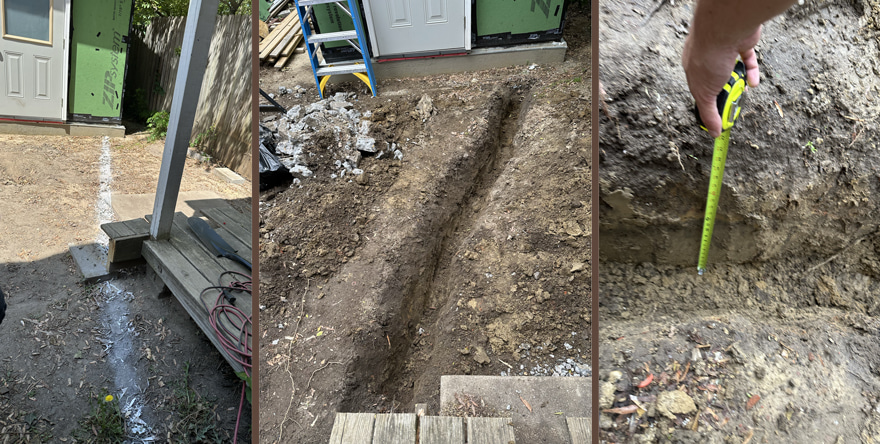
With the deck out of the way, I dug a trench from the meter to the electrical entrance. IRC 2021 calls for 18" of cover over the PVC conduit. I used a drain spade and slowly excavated the 17' long trench. It was a lot easier than my site excavation last year; there was no dirt to haul away and way less dirt to shovel.
Prepping the service entrance
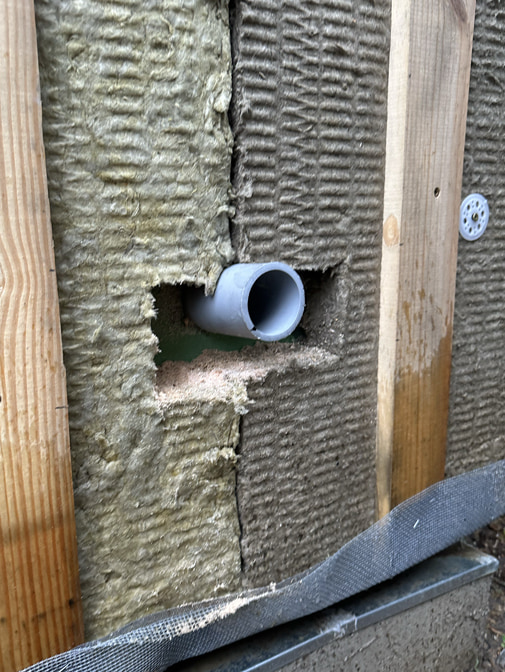
I installed a piece of 1.5" schedule 80 pvc conduit through the sheathing. I opted to do this part myself since there was exterior insulation to deal with (more on that later) and I wanted to make sure I got the detail right. It was easy enough with a 2" hole saw bit for the sheathing and and a handsaw for the pipe.
Electrician's work
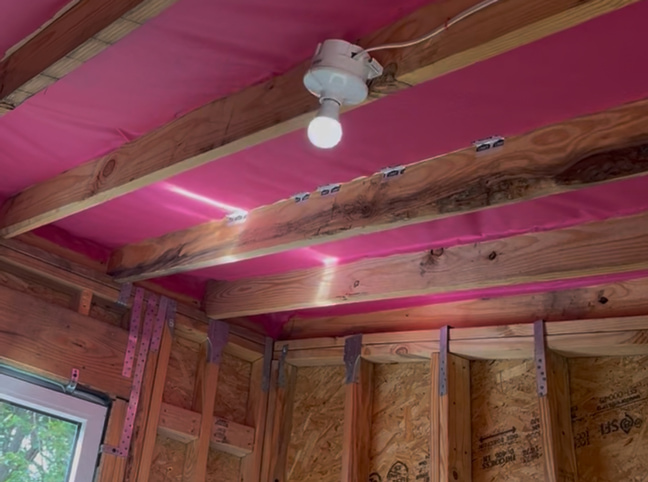
With the prep work done, it was my electrician's time to shine. He installed the conduit, ran the line, installed the breaker panel, outlets, mini-split disconnect, and overhead light, and grounded everything with copper ground rods and wire.
To tie it all back to the electric meter, he spliced a line in the meter and installed a 100 amp disconnect outside for the shed panel.
By the time he left, I was able to flip a switch in the shed and turn on the lights. There was power!
The inspection
All things go... and so too did my shed's power after the inspection.
The inspector ding-ed the electrician for a) installing the shed disconnect separately from the house disconnect (which could be a hazard to fire fighters or future homeowners) b) splicing the line at the meter (this is not allowed for the specific model of meter provided to me by my electric company) and c) some other new National Electrical Code changes.
Electric work part II
My electrician came back after the inspection and installed things to code. He did a great job and I appreciated his willingness to make it right. Unfortunately, one of the issues required my power company, Dominion Energy, to install a new 200 amp service to my meter. Until Dominion did this, the electric work could progress no further.
Off went the shed power and thus began the months long process to try to get Dominion to upgrade my house to the new service line.
Next step: Exterior Insulation and Furring Strips
While I waited for power, there was still plenty of work left to do on the shed / workshop. The next step was to install exterior insulation onto the sheathing and secure it in place with 1x4 furring strips.