More sheathing details
After finishing up the roof, I finished up some odds and ends with the sheathing.
Force Transfer Around Openings
As I talked about in my previous post, the walls of a building must be designed to resist heavy wind and earthquake forces. This is typically done using shear walls: walls with specific diaphragms and nailing patterns which transfer lateral loads to the foundation.
To be effective, a shear wall needs to be wide enough to resist buckling and overturning (this is called the aspect ratio, or h/b). There are various ways to calculate what is considered wide enough / strong enough to be effective. Two typical methods are called Segmented Shear Wall and Perforated Shear Wall.
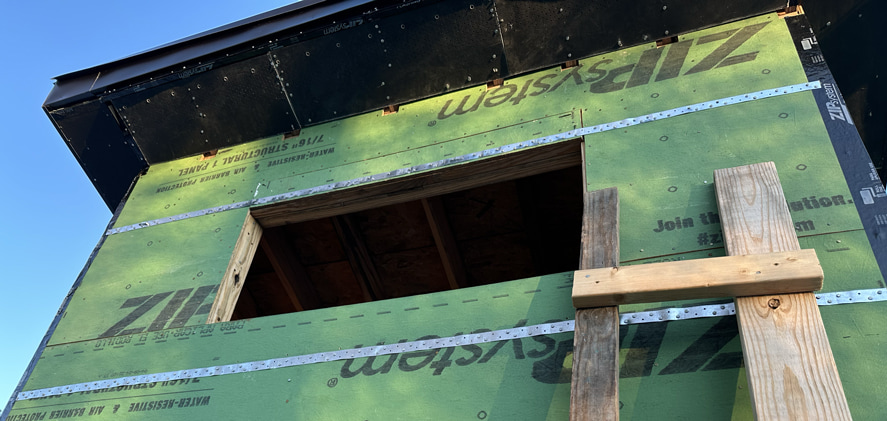
In the Segmented method, only full-height segments (extending from bottom plate to top plate) are included in the analysis. For the tall, back wall of my shed/workshop, I want to include a small window above the loft to let light in. This presents a problem for Segmented shear wall analysis though, since it reduces segment width to an unallowable number.
In the Perforated method, the segment widths are added together, along with an adjustment factor, to calculate the allowable shear capacity. This is great for walls with windows, but it still requires a higher minimum segment width on the ends of the wall than my tiny shed/workshop can accomodate.
Enter Force Transfer Around Openings (FTAO). FTAO allows calculating the height using the height of the opening that the segment is adjacent to. It uses metal coil strapping and blocking to transfer forces around the opening and allows for a minimum segment width of only 2'. This is perfect for my shed/workshop; it means I can install a window. Let there be light!
I installed Mitek 22 gauge metal coil straps around the window on the tall wall in order to transfer tension forces around the window opening. On the interior side of the wall, the metal straps are backed by two layers of 2x4 blocking to transfer compression forces.
Braced wall lines
The tall wall isn't the only wall resisting forces acting on the shed/workshop. The roof acts as a diaphragm to transfer forces to both the tall wall and the short wall. The short wall has 24" wide and 38" wide full-height panels to provide further support to the building.
Mind the gaps

I also closed up the gaps (pictured above, before I sealed them) at the top of the sheathing near the rafters with little pieces of OSB and covered them with Zip sheathing tape to provide a full air/water barrier.
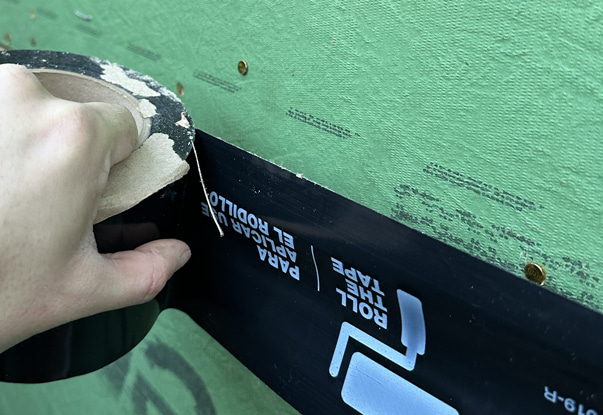
Then I covered all of the sheathing seams with the same Zip System sheathing tape. This creates a continuous air and water barrier on the whole building. I made sure to roll the tape after applying to activate the pressure-sensitive bonding adhesive.

Next I sealed up the gap between the bottom of the sheathing and the concrete slab foundation. I used Polyguard TRM Flashing coupled with 3M 77 Spray Adhesive to create a bug barrier which stops any insects from entering through the gap.

I covered the top of it with Zip flashing tape for good measure, then painted it black as an extra insurance against UV light (and to hide the bright pink color).
Up next
Next I prep and flash the window openings to get them ready for the installation of my tilt/turn European windows!