Tilt-turn European Window Installation
With sheathing details complete, it was time to focus on the windows.
Tilt-turn European Windows

Last year while visiting Portugal, I kept seeing a new style of window I'd never seen before in the US: a tilt-turn window. These windows have a handle, which can be turned, to either tilt the window inward (allowing airflow) or fully swing it open (allowing unobstructed views of the outdoors).
In the building science and passive house communities, tilt-turn windows are old news. European-style window manufacturers offer triple-pane glass, thermally-broken frames, and all sorts of upgrades to increase the R-value. Since I'm just building a shed/workshop, I don't need ultimate thermal efficiency. I want big views and versatility. So I located a supplier of budget-minded units from Aluplast called WinDoorfull and placed an order.
Tilt-turn windows are flangeless
Buying this style of window comes with complications. Windows in the US typically come with a pre-installed nailing flange. This nailing flange makes installing the window onto the sheathing a breeze; just nail it on and cover it with flashing tape.
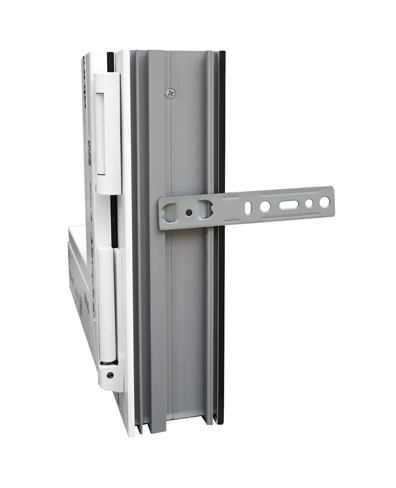
European windows are not so simple. They must be hung from the studs using metal clips which slide into the window frame. To further complicate matters, I'm installing exterior Rockwool insulation onto my shed/workshop. This pushes out the rainscreen and siding an extra 2.75", which needs to be accounted for somehow.
Installation options
My research led me to three options:
To decide between them, I had to consider where the drainage plane of my wall was. The drainage plane is a water-resistant surface of the wall which sheds water. If any water gets behind the siding, it can drain down and out of the wall system using the drainage plane. The same goes for the window. Water should drain down and out.
Since Rockwool doesn't stop water from draining, using the sheathing/weather-resistant barrier (WRB) as the drainage plane made the most sense for the shed/workshop. If I had used a non-permeable or low-permeable exterior insulation like foil-faced EPS, I might have located the drainage plane further out, at the foil face.
A drainage plane at the sheathing/WRB lends itself well to an in-between window, also known as an "in-betweenie." In this method, the window gets installed around the mid-point of the wall. Rather than explain further, I'll just show you.
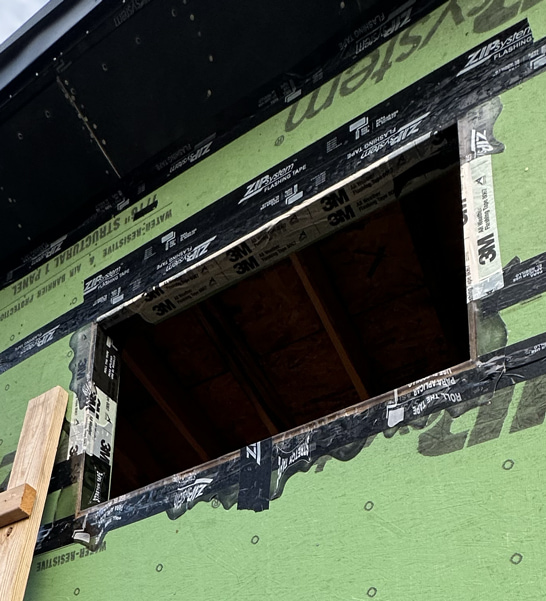
Step 1: Preparing the opening

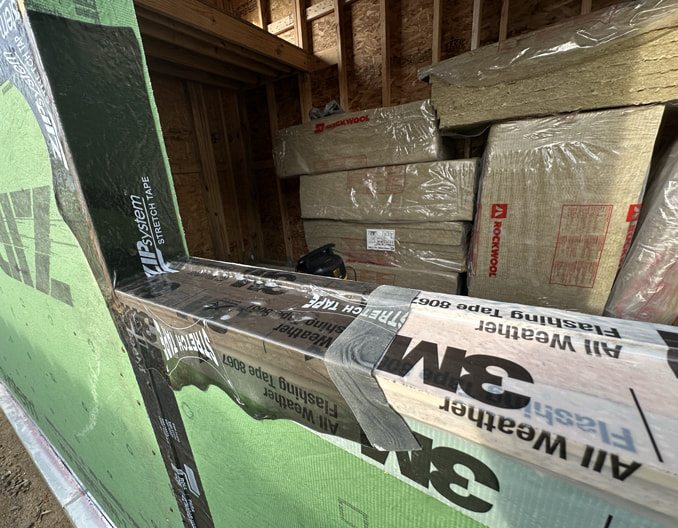
For extra air and water barrier continuity, I installed Zip sheathing all around the rough opening: top, bottom, and sides. I had already accounted for the extra 7/8" (7/16" each side) when laying out my studs and picking my window sizes.
Next, I ripped a piece of leftover Advantech OSB to size to use as a backdam. This acts as an interior barrier to keep water out.
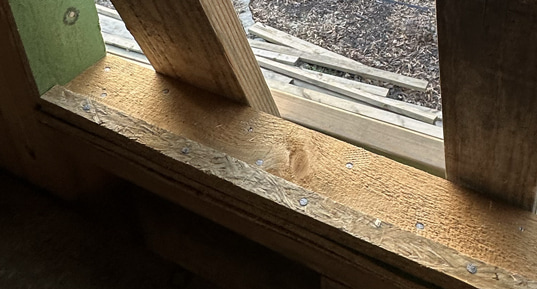
Then, I installed a piece of sloped beveled siding so if water did get in, it would drain out to the sheathing. Don't mind the nails. They get covered up by flashing tape later.
Step 2: Flashing the sill
Good water management is done shingle-style, from the bottom up. So the first order of business was flashing the sill. I used 3M 8067 All Weather Flashing Tape for the center and Zip Stretch Tape for the corners. Using the 8067 tape for the center helped me stretch my usage of the pricier stretch tape.
Step 3: Flashing the sides and the top
The flashing tape continued up the sides and over the top, with stretch tape for the corners.
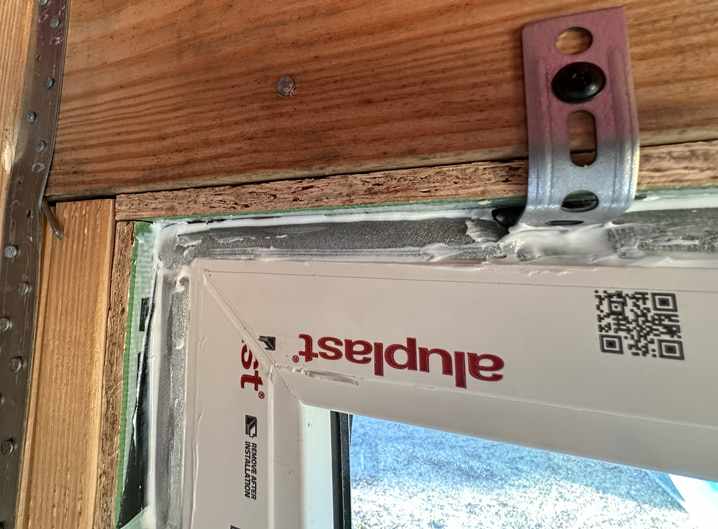
Step 4: Readying the window
The windows came with metal clips which hooked into the window frames. I followed instructions from the manufacturer on spacing and it came out to 2 or 3 clips per side.
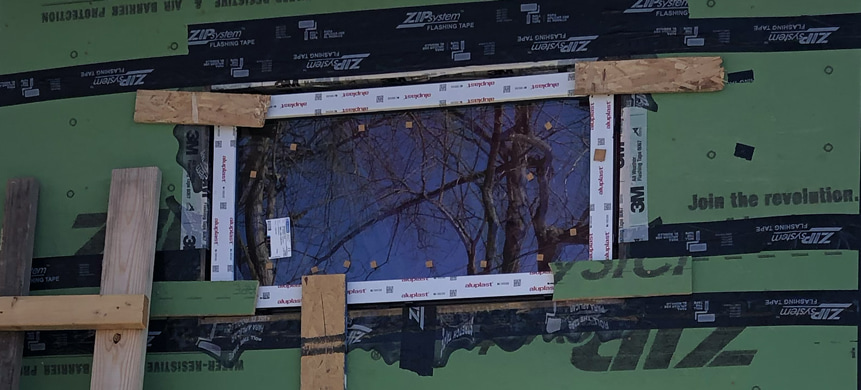
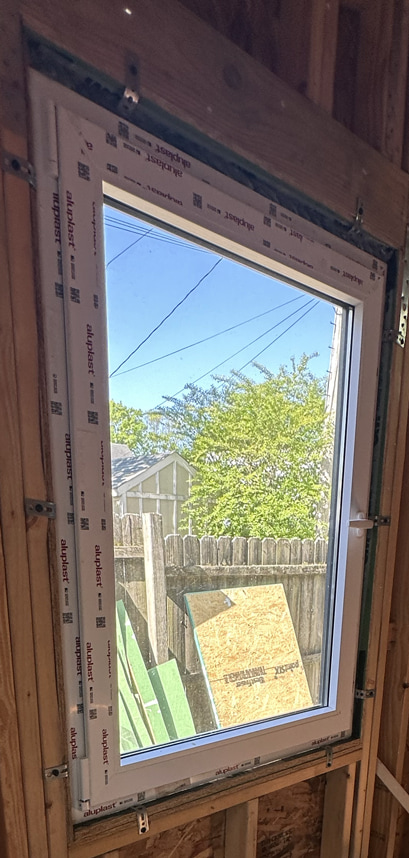
Step 5: Placing the window in the opening
I was blessed to be able to have my parents join me for the actual window install. We first screwed bits of scrap sheathing onto the outer sheathing to help us line the window up with the sheathing plane. Then, my dad and I lifted the window into the opening while my mom steadied it on the outside. We used a level and plastic shims to get it centered and straight. Then we did some more centering and straightening, and some more, until we were finally happy with the placement.
Step 6: Screwing the window in
With the window shimmed and ready, we screwed in the first metal bracket using structural screws. Then we straightened the window again and screwed in the next bracket. The process continued until we had all of the brackets screwed in.
Step 7: Air sealing around the window
We repeated the process for the second window, then started filling in the gaps around the window with closed cell foam backer rods. I used Big Stretch caulk to close up any gaps I missed with the foam.
Step 8: Flashing the outside
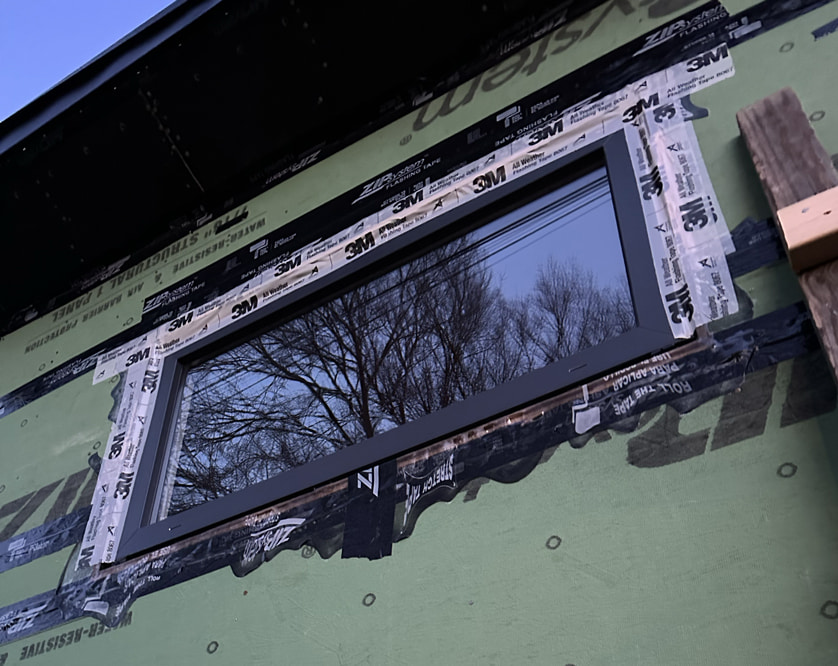
We're not done yet! Next, the outside of the window needed to be flashed to the sheathing. In shingle-fashion, I started with 3M 8067 tape extending up the sides, then covered the top. I left the bottom open so any water that got inside could drain out.
An important thing to keep in mind at this step was how far onto the window my flashing tape extended. Too short and it wouldn't provide sufficient coverage. Too far and it would mess with the installation of the window boxes (exterior fin jambs). But we'll get to those another day.
Up next
Next I prep the door frame, install the door, and finish up the windows with some DIY drip caps.